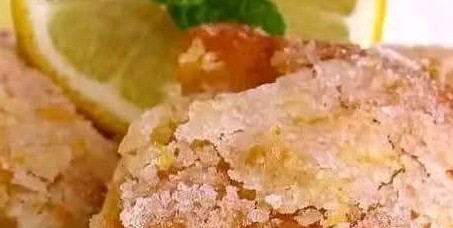
Cream Cheese Squares are a rich, velvety, and indulgent dessert that brings together the buttery goodness of yellow cake with the creamy tang of cheesecake. Whether you’re looking to wow guests at a potluck or want something simple and delicious to whip up at home, this recipe delivers a delightful balance of flavors and textures. Let’s dive deep into the details.
🍰 Ingredients Explained
Here’s what you’ll need to prepare these luscious squares:
✅ Base Layer:
1 box of yellow cake mix:
This shortcut ingredient forms the sweet and buttery foundation of the dessert. The cake mix gives a chewy, soft texture with a subtle vanilla flavor.
2 large eggs (beaten):
Eggs act as a binder, helping the cake mix and butter form a dense, brownie-like crust.
1/2 cup (1 stick) of softened butter:
Adds richness and helps create that melt-in-your-mouth consistency.
✅ Cream Cheese Layer (Topping):
4 cups of confectioner’s sugar (powdered sugar):
Adds sweetness and a creamy consistency to the topping.
1 (8-oz) box of cream cheese (softened):
The star of the show—cream cheese adds tang, body, and smooth texture.
1 teaspoon of vanilla extract:
Enhances the flavor with a warm, aromatic note.
🧁 How to Make Cream Cheese Squares (Step-by-Step)
Step 1: Preheat the Oven
Set your oven to 350°F (175°C) so it’s ready when you are.
Step 2: Prepare the Cake Base
In a medium-sized mixing bowl, combine the cake mix, 2 beaten eggs, and 1/2 cup of softened butter.
Stir until a thick batter forms. It should resemble cookie dough more than traditional cake batter.
Press this mixture evenly into the bottom of a greased 9×13-inch baking dish.
Step 3: Prepare the Cream Cheese Layer
In another bowl, blend together the softened cream cheese, vanilla extract, and confectioner’s sugar.
Beat until the mixture is smooth, creamy, and lump-free.
Step 4: Assemble
Pour or spoon the cream cheese mixture over the cake base in the pan.
Spread it out evenly with a spatula.
Step 5: Bake
Place the pan in the preheated oven and bake for 35 minutes, or until the edges are lightly golden and the center is set but still a little jiggly.
Step 6: Cool and Cut
Let the dessert cool completely before cutting. This allows the layers to firm up and makes slicing easier.
Once cooled, cut into squares and serve.
💡 Tips for Success
Softening Ingredients: Ensure your butter and cream cheese are at room temperature to avoid lumps.
Lining the Pan: For easy removal, consider lining your baking dish with parchment paper.
Don’t Overbake: The center should still have a slight jiggle when you pull it out—this keeps the top layer creamy and soft.
Add-ins: Want to customize? Add a handful of chocolate chips, chopped nuts, or a swirl of fruit preserves on top of the cream cheese layer before baking.
❄️ Storage Instructions
Refrigerator: Store leftovers in an airtight container in the fridge for up to 5 days.
Freezing: You can freeze them for up to 2 months. Wrap individually in plastic wrap and place in a freezer-safe bag.
❓ Frequently Asked Questions (FAQ)
Q: Can I use a different cake mix flavor?
Yes! Try white, spice, or even chocolate cake mix for different variations. Each brings a unique twist.
Q: Can I reduce the sugar?
The sugar contributes to the creamy texture and sweet flavor, but you can reduce it by up to 1 cup if you prefer a less sweet version. Just be aware that it may alter the texture slightly.
Q: What if I don’t have a mixer?
No problem. You can mix everything by hand—just make sure the cream cheese is very soft so you can achieve a smooth consistency.
Q: Can I make this ahead of time?
Absolutely! These squares taste even better the next day after they’ve chilled and set properly in the fridge.
📝 Final Thoughts
Cream Cheese Squares are proof that you don’t need complicated techniques or expensive ingredients to make a crowd-pleasing dessert. With just a handful of pantry staples and a little bit of love, you can create a treat that’s perfect for birthdays, family dinners, or late-night sweet cravings.
