
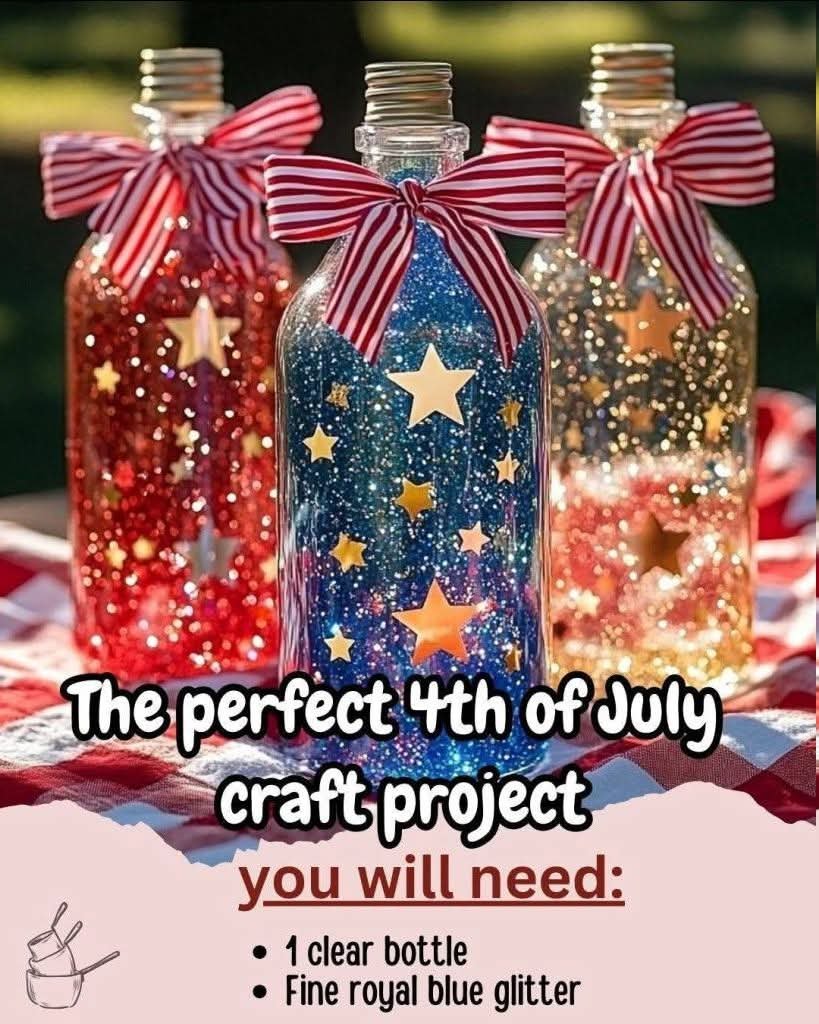
The Perfect 4th of July Craft Project Using Bottles and Glitter
The 4th of July is a time for celebration, fireworks, and the spirit of independence. As we gather with family and friends to commemorate this special day, adding festive decorations can elevate the patriotic spirit in our homes and gardens. One of the most creative ways to do this is through crafting. This article will introduce you to the perfect 4th of July craft project using bottles and glitter that will not only be a delightful addition to your decorations but also provide a memorable activity for both children and adults.
Why Choose Bottles for Crafting?
Using bottles as the base material for your craft project is an environmentally friendly choice. By repurposing glass or plastic bottles, you not only reduce waste but also create something beautiful and functional. Bottles come in various shapes and sizes, making them versatile for a range of crafting ideas. They can be transformed into colorful decorations suitable for indoor and outdoor displays.
The Essential Materials Needed
Before diving into the crafting process, let’s list the materials you’ll need for this exciting 4th of July project:
– Clear or Colored Bottles: Any empty soda, water, or glass bottles work well.
– Glitter: Red, white, and blue glitter are ideal for creating a patriotic theme.
– Mod Podge or Craft Glue: For adhering the glitter to the bottles.
– Paintbrush: To apply the glue.
– Newspaper or Craft Paper: To protect your workspace from excess glitter.
– Ribbon or Twine: For embellishment.
– LED Tea Lights (optional): To create illuminated decor.
– Scissors: For cutting ribbon or twine.
Step-by-Step Instructions
Step 1: Preparing Your Bottles
Start by thoroughly cleaning your bottles. Remove labels by soaking them in warm soapy water. Scrape off any leftover adhesive with a scraper or sponge. Once cleaned, dry the bottles completely to ensure that the glue adheres properly.
Step 2: Applying the Glue
Lay your newspapers or craft paper on your workspace to prevent a mess. Using the paintbrush, apply a generous layer of Mod Podge or craft glue to one section of the bottle. This will create a sticky surface for the glitter to adhere to.
Step 3: Adding Glitter
Sprinkle the glitter over the glued area of the bottle while it is still wet. Make sure to cover the area evenly. You can mix the colors for a unique effect, or stick to one color for a classic look. Allow the glitter to adhere for a few minutes, then gently shake off any excess glitter.
Step 4: Repeat
Continue this process by applying glue and glitter to different sections of the bottle. You can create patterns or simply cover the whole bottle. For added texture, consider using different shades of red, white, and blue glitter.
Step 5: Drying Time
Once you have completed your glitter application, it is essential to let the bottles dry completely. Leave them in a well-ventilated area for at least an hour or until the glue is fully set.
Step 6: Finishing Touches
After the bottles are dry, you can add some flair. Wrap ribbon or twine around the neck of the bottle for a polished look. Consider making bows or looping the ribbon for additional creativity.
Step 7: Optional Illumination
For a stunning effect, place an LED tea light inside the bottle. This will create a glowing centerpiece that is perfect for nighttime celebrations. Ensure the bottle is designed to allow light to shine through, showcasing your dazzling glitter work.
Displaying Your Glittery Bottles
Now that your craft project is complete, it’s time to showcase your creations. Here are some ideas for displaying your glittery bottles:
– Table Centerpieces: Arrange several decorated bottles as a centerpiece on your dining or picnic table.
– Outdoor Decor: Place the bottles along your porch or patio to welcome guests with a festive glow.
– Firework Display: Create a display of bottles that mimic fireworks by contrasting various heights and colors across your yard.
Benefits of Crafting
Engaging in craft projects like this not only fosters creativity but also serves as a great bonding activity for families. It allows participants to express their patriotic spirit while enhancing fine motor skills and encouraging artistic expression. Plus, the end result is a beautiful decoration that adds a personal touch to your 4th of July celebrations.
Conclusion
Creating decorative items for the 4th of July can be an enjoyable and rewarding way to celebrate this important holiday. By using bottles and glitter, you can make stunning decorations that are environmentally friendly and personalized. This craft project is accessible for all skill levels and can be customized to fit your tastes.
Grab your bottles, some glitter, and let imagination flow as you create this perfect 4th of July craft project. Get ready to impress your guests and enjoy the vibrant atmosphere of independence day with your handcrafted decorations! Happy crafting!