
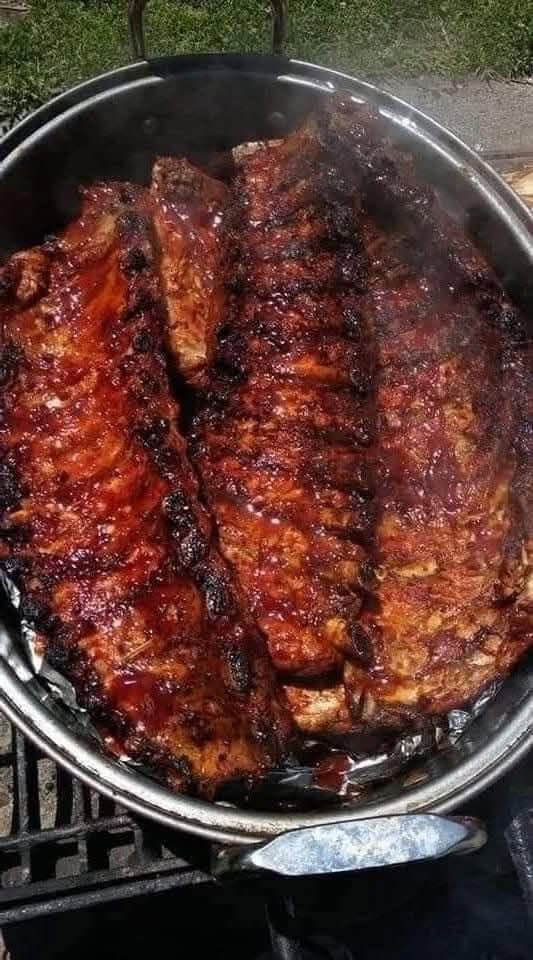
Baked BBQ Baby Back Ribs
When it comes to a delicious meal that satisfies everyone at the table, few dishes can compete with baked BBQ baby back ribs. This succulent and flavorful dish is perfect for family gatherings, weekend barbecues, or simply a cozy dinner at home. In this comprehensive guide, we will explore everything you need to know about preparing and enjoying mouthwatering baked BBQ baby back ribs, from selecting the best ingredients to cooking methods and tips for achieving that perfect fall-off-the-bone texture.
Understanding Baby Back Ribs
Baby back ribs, also referred to as loin ribs or back ribs, are taken from the top of the rib cage between the spine and the spare ribs. These ribs are tender, shorter, and have a higher meat-to-bone ratio than spare ribs. This makes them not only delectable but also a popular choice among meat lovers. Their tenderness allows them to soak up flavors beautifully, making them an ideal candidate for a smoky, sweet BBQ sauce.
Choosing the Right Ribs
When you’re ready to prepare your baked BBQ baby back ribs, the first step is selecting the right cut. Here are some tips for choosing high-quality baby back ribs:
1. Look for Meat Thickness: Select ribs that have a good layer of meat on top of the bones. Thicker meat usually means more flavor and a satisfying texture once cooked.
2. Check the Color: Fresh ribs should have a pinkish-red color, indicating freshness. Avoid any ribs that appear discolored or have excessive liquid in the packaging.
3. Marbling: Look for ribs with some marbling—this fat will render during cooking, adding flavor and tenderness to the meat.
4. Visit a Trusted Source: If possible, buy your baby back ribs from a local butcher or trusted grocery store to ensure quality.
Ingredients for Baked BBQ Baby Back Ribs
To create the ultimate baked BBQ baby back ribs, you’ll need the following ingredients:
For the Ribs:
– 2 racks of baby back ribs
– 1 tablespoon olive oil
– Salt and pepper, to taste
For the Dry Rub:
– 1 tablespoon smoked paprika
– 1 tablespoon brown sugar
– 2 teaspoons garlic powder
– 2 teaspoons onion powder
– 1 teaspoon chili powder
– 1 teaspoon cumin
– 1 teaspoon black pepper
– ½ teaspoon cayenne pepper (optional for heat)
For the BBQ Sauce:
– 1 cup of your favorite BBQ sauce (store-bought or homemade)
– Optional: A splash of apple cider vinegar for tanginess
Preparing the Ribs
Step 1: Preheat the Oven
Begin by preheating your oven to 300°F (150°C). Low and slow is the name of the game when it comes to baking tender ribs.
Step 2: Prepare the Ribs
1. Remove the Membrane: Start by flipping the ribs bone side up. There’s a thin membrane that covers the bones; removing this will help the spices penetrate the meat better. Use a sharp knife to lift an edge and pull it off, using a paper towel for grip.
2. Rinse and Dry: Rinse the ribs under cold water and pat them dry with paper towels.
3. Apply Olive Oil: Rub the ribs with olive oil, which helps the dry rub stick.
Step 3: Season with Dry Rub
In a bowl, mix together the ingredients for the dry rub. Generously apply the dry rub over the entire surface of the ribs, pressing it in to ensure it adheres well. Let the ribs marinate for at least 30 minutes (or up to overnight in the refrigerator) to allow the flavors to meld.
Baking the Ribs
Step 4: Wrap in Foil
Once seasoned, wrap the ribs tightly in aluminum foil. This will create a steaming effect and keep the ribs moist as they bake. Place the wrapped ribs on a baking sheet to catch any drippings.
Step 5: Bake Low and Slow
Place the baking sheet with the wrapped ribs into the preheated oven and bake for 2.5 to 3 hours. This low-temperature cooking will tenderize the meat, making it juicy and flavorful.
Step 6: Add BBQ Sauce
After baking, carefully remove the ribs from the oven and unwrap the foil. At this stage, you can brush a generous layer of your favorite BBQ sauce over the ribs. If you like, you can return the unwrapped ribs to the oven for an additional 30 minutes at 400°F (200°C) to caramelize the sauce and add a beautiful glaze.
Achieving the Perfect Finish
Step 7: Broil for Extra Crispness
For that perfect finish, set your oven to broil and place the ribs under the broiler for 3 to 5 minutes. Keep a close eye on them to ensure they don’t burn. This step creates caramelization and adds that slightly crispy texture that everyone loves.
Serving the Baked BBQ Baby Back Ribs
Pairing Suggestions
Once your baked BBQ baby back ribs are ready, it’s time to slice them up and serve. Here are some pairing suggestions to enhance your meal:
– Side Dishes: Classic side dishes like coleslaw, baked beans, corn on the cob, or mac and cheese complement the rich flavors of the ribs beautifully.
– Beverage Pairings: A refreshing iced tea or a cold beer can balance the smoky richness, making for a delightful dining experience.
Cooking Tips for Leftovers
If you have any leftovers, they can be stored in an airtight container in the refrigerator for up to three days. To reheat, wrap the ribs in foil and warm them in the oven at 300°F (150°C) until heated through. Alternatively, you can pop them on a grill for a few minutes, brushing with additional BBQ sauce to refresh their flavor.
Conclusion
Baked BBQ baby back ribs are not only a crowd-pleaser but also a versatile dish that can be enjoyed in various settings. Whether you’re cooking for your family or hosting a gathering, this recipe provides a guaranteed hit. By following these steps, you can create tender, flavorful ribs that melt in your mouth and leave a lasting impression on your guests. Enjoy every bite of this succulent dish, and don’t forget to experiment with different sauces and sides to make it uniquely yours!